博威---云架构决胜云计算

 找回密码
 注册

QQ登录

只需一步,快速开始

搜索
查看: 5735|回复: 13

Cherokee:最快的 Web 服务器?

[复制链接]
发表于 2010-3-14 14:01:24 | 显示全部楼层 |阅读模式
轻量级Web Server性能比拼
最近,一个全新的轻量级Web服务器Cherokee发布了,它号称是速度最快的Web Server,性能超越目前红的发紫的nginx和lighttpd。

hutuworm做了相应的性能测试,测试结果总结:

引用
于是兄弟我顺便把最新版的 Nginx、Lighttpd、Apache 都拿来测了一圈。结果出人意料,Cherokee 牛皮吹爆,各项得分都低于 Nginx 和 Lighttpd。Lighttpd 1.4.20 最近修正了一大堆 bug,在多项测试中性能表现超越 Nginx,成为 Web 服务器领域暂时的王者(皇帝轮流做,这个位子不稳当)。真正令人震惊的是,Apache httpd 服务器颓势凸显,在多项测试中的性能表现真的只有上述三者一半左右,高并发(C=3000)状况下甚至根本无法完成测试。详见测试结果:

644cae31-426c-34bc-8c44-851576842e2a.png
  

引用
Apache 的问题不多说了,这么丑陋的数据摆在那儿,有的人喜欢抱残守缺,那就让他们抱去。Cherokee 虽然比 Lighttpd 和 Nginx 略输一筹,但还是非常值得推荐给入门级的网站管理员使用。因为 Cherokee 附带一个非常易用的 Web 管理界面,可以轻松完成各种配置,入门级用户一般不会出错

总之,Lighttpd 和 Nginx 是大容量、高并发网站的当然之选,入门级网站可以考虑使用 Cherokee 快速上手。至于 Apache 么,当作玩具留着玩,或者当作古董供起来吧。
 楼主| 发表于 2010-3-14 14:03:59 | 显示全部楼层
Cherokee:最快的 Web 服务器?
在汽车世界中,形象憨厚的大切(Grand Cherokee)肯定不是跑得最快的车。而在强手如林的 Web 服务器领域,新锐Cherokee号称是当前最快的 Web 服务器,悍然超越了很多人认为还属于新事物的 Lighttpd、Nginx,性能高出作为行业标准的 Apache 一倍有余。

于是兄弟我顺便把最新版的 Nginx、Lighttpd、Apache 都拿来测了一圈。结果出人意料,Cherokee 牛皮吹爆,各项得分都低于 Nginx 和 Lighttpd。Lighttpd 1.4.20 最近修正了一大堆 bug,在多项测试中性能表现超越 Nginx,成为 Web 服务器领域暂时的王者(皇帝轮流做,这个位子不稳当)。真正令人震惊的是,Apache httpd 服务器颓势凸显,在多项测试中的性能表现真的只有上述三者一半左右,高并发(C=3000)状况下甚至根本无法完成测试。详见测试结果:

N=500000
C=20C=100C=1000C=3000
Cherokee 0.11.51KB40.9340.8447.9967.65
10KB46.7645.2855.2567.17
100KB136.64134.42150.52159.67
1000KB683.16676.39877.261086.35
Nginx 0.7.271KB36.5935.8242.8856.57
10KB38.8136.6144.9760.78
100KB88.4281.5399.83123.88
1000KB658.39659.58840.941055.47
Lighttpd 1.4.201KB34.9834.2341.9150.85
10KB36.2936.7943.7155.89
100KB88.1983.51100.68123.17
1000KB669.61669.36829.241081.38
Apache 2.2.111KB101.4786.7795.22N/A
10KB99.5188.3199.82N/A
100KB143.76136.81183.41N/A
1000KB718.17725.46957.25N/A


Seconds


有图有真相:
644cae31-426c-34bc-8c44-851576842e2a.png

Apache 的问题不多说了,这么丑陋的数据摆在那儿,有的人喜欢抱残守缺,那就让他们抱去。Cherokee 虽然比 Lighttpd 和 Nginx 略输一筹,但还是非常值得推荐给入门级的网站管理员使用。因为 Cherokee 附带一个非常易用的Web 管理界面,可以轻松完成各种配置,入门级用户一般不会出错:


总之,Lighttpd 和 Nginx 是大容量、高并发网站的当然之选,入门级网站可以考虑使用 Cherokee 快速上手。至于 Apache 么,当作玩具留着玩,或者当作古董供起来吧。
 楼主| 发表于 2010-3-14 14:20:06 | 显示全部楼层
译文原文地址:http://rocing.cn/?action=show&id=132 自己翻译的 英语太烂翻译的不好请大家拍砖 “Cherokee是一个非常快速,灵活和易于配置Web服务器。它支持广泛的技术现在: FastCGI , SCGI , PHP,CGI,TLS和SSL加密连接,虚拟主机,认证,flay encoding,负载平衡,apache兼容日志,以及更多。本教程演示了如何从源安装Ubuntu 8.10+PHP 5+MySQL5+Cherokee(lcmp)的Web服务器 1 )初步说明 我使用的是Ubuntu的8.10服务器系统。修改你需要的源 2 )安装MySQL 你需要一个数据库服务器运行PHP脚本,使用MySQL来管理数据存储在用户的数据库。你可以安装它(和客户端)输入:

CODE:

apt-get install mysql-server-5.0 mysql-client 3 )设置MySQL的root用户密码 在使用mysql之前需要为root帐户设置一个密码,在mysql服务安装之后将会有这一部的提示。请记住,没有设置root密码,那么每个人都可以进入你的MySQL服务器。 4)安装PHP PHP是一种脚本语言用于运行脚本,可以在服务器端运行不同的php程序。您可以这样安装:

CODE:

apt-get install php5-cgi PHP有一个MySQL服务器接口,安装输入以下内容:

CODE:

apt-get install php5-mysql

5 )安装一些必要的软件包

我们将编译Cherokee 来源,所以我们需要一个C++编译器和其他一些有用的软件包:

CODE:

apt-get install cpp gcc g++ make 6 )下载,编译和安装Cherokee Web服务器下载 Cherokee 到 /tmp:

CODE:

cd /tmp wget http://www.cherokee-project.com/ ... e-latest-svn.tar.gz 我下载的时候最后一个版本是0.12.*** 如果后面有b的话 说明这个一个测试版本的,此仍可能有一些错误。你可以下载并使用一个稳定的版本http://www.cherokee-project.com/download/ 解压下载的包

CODE:

tar -zxvf cherokee-latest-svn.tar.gz

进入新的目录:

CODE:

cd cherokee-版本号
现在,它已经配置了我们的需要。这是推荐的方式:

CODE:

./configure --localstatedir=/var --prefix=/usr --sysconfdir=/etc --with-wwwroot=/var/www

编译

CODE:

make

安装

CODE:

make install

如果出现错误 如“configure:error:no acceptable c compiler found in $path”

说明你的编译器可能没有安装好 重复一下第五步。

7)启动 Cherokee

复制启动脚本在/etc/init.d/(不要离开切诺基,尚未0.12.***目录)并nano一下他:

这么写

CODE:

cp contrib/cherokee /etc/init.d/cherokee nano /etc/init.d/cherokee

修改两行 这样修改

CODE:

DAEMON=/usr/sbin/cherokee CONF=/etc/cherokee/cherokee.conf

保存关闭(ctrl+x)Y

更改权限 给到755

CODE:

chmod 755 /etc/init.d/cherokee

检查一下 好不好时 呵呵

CODE:

/etc/init.d/cherokee start /etc/init.d/cherokee stop /etc/init.d/cherokee restart

使启动链接在不同的运行级别:

CODE:

update-rc.d cherokee defaults

这样一切就可以正常工作了。您可以测试PHP和它的模块,建立一个名为nfo.php文件 ,使其在document_root的服务器。它应该包含

CODE:

<?php phpinfo();?>

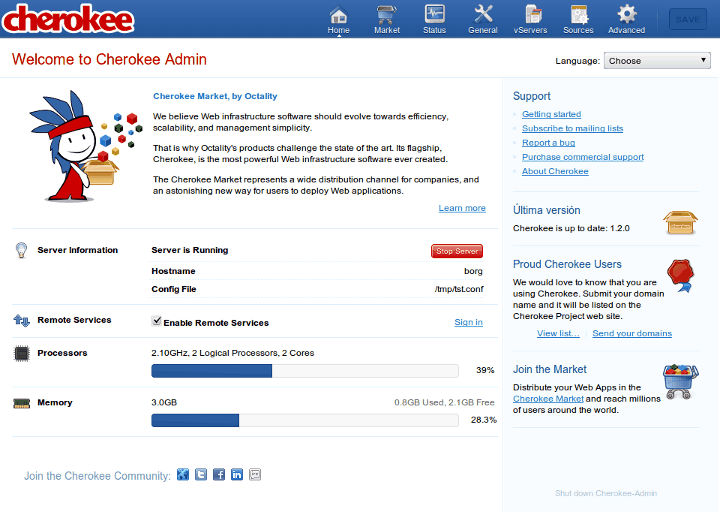
下一步在浏览器打开此文件: http://serveripaddress/info.php

OK!

然后可以重新启动一下服务器,看看切诺基是否自动启动

继续配置:http://rocing.cn/?action=show&id=133

8)配置cherokee 服务

这是Cherokee特别之处。有许多方式可以配置它。可以用传统方式通过编辑配置文件,但在这种情况下,不建议。它也可以做到使用网络端口成为Cherokee的管理员。根据预设Cherokee管理员是唯一可以从服务器。在启动它的cherokee-admin,将产生一个一次性密码,可以向您显示和绑定的本地端口9090 。要访问你将不得不打开http://localhost:9090在浏览器工作在服务器上。安装一个图形界面的服务器(您可以使用文本浏览器,但不会使配置容易)你必须找到一种方法,达到cherokee-admin从远程客户端。以下是如何可以做到这一点(挑选您最喜爱的) : (请务必检查是否有任何防火墙规则阻挡端口9090)

设置一个SSH通道 用这个就是把上步监听的9090 端口 链接到客户端 也就是说你让可以链接到 cherokee-admin 的 http://127.0.0.1:9090 所有您需要做的就是打开一个终端,并连接到服务器使用SSH :

CODE:

ssh root@serveripaddress

启动cherokee-admin

CODE:

cherokee-admin

这样你会看到一些一般性的信息的应用,用户名和密码为一次性用于登录到网络接口。现在打开一个新的终端窗口和连接到服务器再次像这样:

CODE:

ssh -L 9090:127.0.0.1:9090 root@serveripaddress

输入您的密码。现在,您可以在浏览器中开启http://127.0.0.1:9090

 楼主| 发表于 2010-3-14 14:21:11 | 显示全部楼层
听说Cherokee跟Cherokee车一样快,今天开来练练
官文网址:http://www.cherokee-project.com/
与其它web server性能比较:http://www.cherokee-project.com/benchmarks.html

一、安装:
mkdir install && cd install
wget http://www.cherokee-project.com/ ... rokee-0.11.6.tar.gz
tar -zxvf cherokee-0.11.6.tar.gz
cd cherokee-0.11.6
./configure --prefix=/usr/local/cherokee
make
make install

二、运行
运行管理界面
/usr/local/cherokee/sbin/cherokee-admin -b 192.168.100.10 -p 8080 -C /usr/local/cherokee/etc/cherokee/cherokee.conf
Login:
User: admin
One-time Password: jnA5sivyp9Fk1xQ1

Cherokee Web Server 0.11.6 (Jan 15 2009): Listening on port 8080, TLS disabled,
IPv6 disabled, using epoll, 20480 fds system limit, max. 10233
connections, single thread

说明:
1、-b 192.168.100.10:邦定该IP,只允许从该IP访问管理平台。
2、-p 8080:管理端口
3、-C /usr/local...:配制文件
4、密码是一次性的

启动管理平台支持,是python写的。不然会报:503 Service Unavailable
/usr/local/cherokee/share/cherokee/admin/server.py 4000 /usr/local/cherokee/etc/cherokee/cherokee.conf

三、配制
http://192.168.100.2:8080/
管理界面出来了,如图:


1、Status
显示cherokee服务的基本信息。
2、General
普通设置,包括端口、用户、组、超时等。
3、Virtual Servers
虚拟主机的配置,包括主机克隆、域名、主目录、主机路由、站点编码、gzip压缩、过期、验证等等。
注:如只有一个虚拟主机时,必须设置Virtual Server nickname为'default'
4、Information Sources
消息源,方便多主机配置用。
5、Icons
主机图标管理
6、MIME types
配制主机支持的MIME头支持。
7、Advanced
高级配置,包括最大连接数、线程数、IO缓存等。
 楼主| 发表于 2010-3-14 14:23:38 | 显示全部楼层
 楼主| 发表于 2010-3-14 14:25:10 | 显示全部楼层
Ubuntu cherokee php5 mysql5 vm/vps安装随笔

安装环境:ubuntu 9.10 server 无X-Windows
为什么选择cherokee而不选择apache nginx lighttpd这些大牌,因为使用VPS/VM的用户站点一般都不会是大型站点,cherokee号称最快的web服务器软件有它的优势,在低并发下100并发(10万浏览量/天)的情况下,甚至比nginx还快些,其次cherokee带有可视化的web控制面版,方便使用者管理自己的服务器,开设虚拟主机.
cherokee的控制面版采用一次性动态密码,每次输入命令才能启动控制面版,安全性大大提高


1.打开这个地址选择你系统对版的源
https://launchpad.net/~cherokee-webserver/+archive/ppa

2.编辑sources.list把源加到最后

vi /etc/apt/sources.list

比如是ubuntu 9.10就加下面的
deb http://ppa.launchpad.net/cherokee-webserver/ppa/ubuntu karmic main
deb-src http://ppa.launchpad.net/cherokee-webserver/ppa/ubuntu karmic main
3.导入key

apt-key adv –keyserver keyserver.Ubuntu.com –recv-keys EBA7BD49

4.更新

apt-get update
apt-get upgrade
apt-get dist-upgrade

5.安装必要组件

apt-get install cpp gcc g++ make

6.安装MYSQL,安装过程中需要设置mysql密码

apt-get install mysql-server mysql-client -y

7.安装PHP

apt-get install php5-cgi php5-mysql php5-curl php5-gd php5-idn php5-dev php5-imap php5-mcrypt php5-ming php5-pspell php5-recode php5-snmp php5-tidy php5-xmlrpc php5-sqlite php5-xsl -y

8.安装cherokee

apt-get install cherokee

9.启动cherokee控制面版,会随机产生一个一次性密码,控制面版地址http://IP:9090

cherokee-admin -b

原创文章,转载请注明: 转载自纯 白 色
本文链接地址: Ubuntu cherokee php5 mysql5 vm/vps安装随笔

 楼主| 发表于 2010-3-14 14:26:44 | 显示全部楼层
CentOS5+Cherokee+PHP+MySQL安装

Submitted by rocing on 2010, March 3, 9:21 AM. 系统&服务


系统环境:CentOS 5.2,最小化安装,未定制软件,禁用iptables,selinux
主要参考文章:
Nginx 0.7.x + PHP 5.2.8(FastCGI)搭建胜过Apache十倍的Web服务器(第4版)[原创] http://blog.s135.com/nginx_php_v4/

Cherokee Installation on Unix http://www.cherokee-project.com/doc/basics_installation_unix.html
cherokee下设置local与remote方式的php fastcgi http://ipbfans.org/2009/01/cherokee-php-fastcgi-local-remote
RedHat/CentOS下的cherokee的启动脚本 http://ipbfans.org/2009/01/redhat-centos-cherokee-init-script


一、下载所需软件
mkdir /root/download
cd /root/download
vi down.sh
添加以下内容
wget http://sysoev.ru/nginx/nginx-0.7.47.tar.gz
wget http://www.php.net/get/php-5.2.8.tar.gz/from/this/mirror
wget http://php-fpm.anight.org/downlo ... -fpm-0.5.10.diff.gz
wget http://dev.mysql.com/get/Downloa ... mirror.redwire.net/
wget http://ftp.gnu.org/pub/gnu/libiconv/libiconv-1.13.tar.gz
wget "http://downloads.sourceforge.net/mcrypt/libmcrypt-2.5.8.tar.gz?modtime=1171868460&big_mirror=0"
wget "http://downloads.sourceforge.net/mcrypt/mcrypt-2.6.8.tar.gz?modtime=1194463373&big_mirror=0"
wget http://pecl.php.net/get/memcache-2.2.5.tgz
wget "http://downloads.sourceforge.net/mhash/mhash-0.9.9.9.tar.gz?modtime=1175740843&big_mirror=0"
wget ftp://ftp.csx.cam.ac.uk/pub/soft ... cre/pcre-7.8.tar.gz
wget http://bart.eaccelerator.net/sou ... tor-0.9.5.3.tar.bz2
wget http://pecl.php.net/get/PDO_MYSQL-1.0.2.tgz

保存退出
sh down.sh
这样就可以下载了,不用每次复制粘贴过去进行下载

二、安装基本软件
yum -y install gcc gcc-c++ autoconf libjpeg libjpeg-devel libpng libpng-devel freetype freetype-devel libxml2 libxml2-devel zlib zlib-devel glibc glibc-devel glib2 glib2-devel bzip2 bzip2-devel ncurses ncurses-devel curl curl-devel e2fsprogs e2fsprogs-devel krb5 krb5-devel libidn libidn-devel openssl openssl-devel

三、安装PHP 5.2.8(FastCGI模式)
1、编译安装PHP 5.2.8所需的支持库:
tar zxvf libiconv-1.13.tar.gz
cd libiconv-1.13/
./configure --prefix=/usr/local
make
make install
cd ../

tar zxvf libmcrypt-2.5.8.tar.gz
cd libmcrypt-2.5.8/
./configure
make
make install
/sbin/ldconfig
cd libltdl/
./configure --enable-ltdl-install
make
make install
cd ../../

tar zxvf mhash-0.9.9.9.tar.gz
cd mhash-0.9.9.9/
./configure
make
make install
cd ../

ln -s /usr/local/lib/libmcrypt.la /usr/lib/libmcrypt.la
ln -s /usr/local/lib/libmcrypt.so /usr/lib/libmcrypt.so
ln -s /usr/local/lib/libmcrypt.so.4 /usr/lib/libmcrypt.so.4
ln -s /usr/local/lib/libmcrypt.so.4.4.8 /usr/lib/libmcrypt.so.4.4.8
ln -s /usr/local/lib/libmhash.a /usr/lib/libmhash.a
ln -s /usr/local/lib/libmhash.la /usr/lib/libmhash.la
ln -s /usr/local/lib/libmhash.so /usr/lib/libmhash.so
ln -s /usr/local/lib/libmhash.so.2 /usr/lib/libmhash.so.2
ln -s /usr/local/lib/libmhash.so.2.0.1 /usr/lib/libmhash.so.2.0.1

tar zxvf mcrypt-2.6.8.tar.gz
cd mcrypt-2.6.8/
/sbin/ldconfig
./configure
make
make install
cd ../

2、编译安装MySQL 5.1.33
/usr/sbin/groupadd mysql
/usr/sbin/useradd -g mysql mysql
unzip mysql-5.1.33.zip
cd mysql-5.1.33/
./configure --prefix=/usr/local/webserver/mysql/ --enable-assembler --with-extra-charsets=complex --enable-thread-safe-client --with-big-tables --with-readline --with-ssl --with-embedded-server --enable-local-infile --with-plugins=innobase
make && make install
chmod +w /usr/local/webserver/mysql
chown -R mysql:mysql /usr/local/webserver/mysql
cp support-files/my-medium.cnf /usr/local/webserver/mysql/my.cnf
cd ../

vi /usr/local/webserver/mysql/my.cnf,将其这个选项注解掉
#--skip-federated

①、以mysql用户帐号的身份建立数据表:
/usr/local/webserver/mysql/bin/mysql_install_db --basedir=/usr/local/webserver/mysql --datadir=/usr/local/webserver/mysql/data --user=mysql

②、启动MySQL(最后的&表示在后台运行)
/bin/sh /usr/local/webserver/mysql/bin/mysqld_safe --defaults-file=/usr/local/webserver/mysql/my.cnf &

设置MySQL开机自动运行
vi /etc/rc.local
添加以下内容
/usr/local/webserver/mysql/bin/mysqld_safe --defaults-file=/usr/local/webserver/mysql/my.cnf &

3、编译安装PHP(FastCGI模式)
tar zxvf php-5.2.8.tar.gz
gzip -cd php-5.2.8-fpm-0.5.10.diff.gz | patch -d php-5.2.8 -p1
cd php-5.2.8/
./configure --prefix=/usr/local/webserver/php --with-config-file-path=/usr/local/webserver/php/etc --with-mysql=/usr/local/webserver/mysql --with-mysqli=/usr/local/webserver/mysql/bin/mysql_config --with-iconv-dir=/usr/local --with-freetype-dir --with-jpeg-dir --with-png-dir --with-zlib --with-libxml-dir=/usr --enable-xml --disable-rpath --enable-discard-path --enable-safe-mode --enable-bcmath --enable-shmop --enable-sysvsem --enable-inline-optimization --with-curl --with-curlwrappers --enable-mbregex --enable-fastcgi --enable-fpm --enable-force-cgi-redirect --enable-mbstring --with-mcrypt --with-gd --enable-gd-native-ttf --with-openssl --with-mhash --enable-pcntl --enable-sockets
make ZEND_EXTRA_LIBS='-liconv'
make install
cp php.ini-dist /usr/local/webserver/php/etc/php.ini
cd ../

4、编译安装PHP5扩展模块
tar zxvf memcache-2.2.5.tgz
cd memcache-2.2.5/
/usr/local/webserver/php/bin/phpize
./configure --with-php-config=/usr/local/webserver/php/bin/php-config
make
make install
cd ../

tar jxvf eaccelerator-0.9.5.3.tar.bz2
cd eaccelerator-0.9.5.3/
/usr/local/webserver/php/bin/phpize
./configure --enable-eaccelerator=shared --with-php-config=/usr/local/webserver/php/bin/php-config
make
make install
cd ../

tar zxvf PDO_MYSQL-1.0.2.tgz
cd PDO_MYSQL-1.0.2/
/usr/local/webserver/php/bin/phpize
./configure --with-php-config=/usr/local/webserver/php/bin/php-config --with-pdo-mysql=/usr/local/webserver/mysql
make
make install
cd ../

5、修改php.ini文件
手工修改:查找/usr/local/webserver/php/etc/php.ini中的extension_dir = "./"
修改为extension_dir = "/usr/local/webserver/php/lib/php/extensions/no-debug-non-zts-20060613/"
并在此行后增加以下几行,然后保存:
extension = "memcache.so"
extension = "pdo_mysql.so"

再查找output_buffering = Off
修改为output_buffering = On

自动修改:若嫌手工修改麻烦,可执行以下shell命令,自动完成对php.ini文件的修改:
sed -i 's#extension_dir = "./"#extension_dir = "/usr/local/webserver/php/lib/php/extensions/no-debug-non-zts-20060613/"\nextension = "memcache.so"\nextension = "pdo_mysql.so"\n#' /usr/local/webserver/php/etc/php.ini
sed -i 's#output_buffering = Off#output_buffering = On#' /usr/local/webserver/php/etc/php.ini

6、配置eAccelerator加速PHP:
mkdir -p /usr/local/webserver/eaccelerator_cache
vi /usr/local/webserver/php/etc/php.ini

按shift+g键跳到配置文件的最末尾,加上以下配置信息:
[eaccelerator]
zend_extension="/usr/local/webserver/php/lib/php/extensions/no-debug-non-zts-20060613/eaccelerator.so"
eaccelerator.shm_size="128"
eaccelerator.cache_dir="/usr/local/webserver/eaccelerator_cache"
eaccelerator.enable="1"
eaccelerator.optimizer="1"
eaccelerator.check_mtime="1"
eaccelerator.debug="0"
eaccelerator.filter=""
eaccelerator.shm_max="0"
eaccelerator.shm_ttl="300"
eaccelerator.shm_prune_period="120"
eaccelerator.shm_only="0"
eaccelerator.compress="1"
eaccelerator.compress_level="9"

vi /etc/sysctl.conf
修改kernel.shmmax为以下值
kernel.shmmax = 134217728
然后执行以下命令使配置生效:
/sbin/sysctl -p

7、创建www用户和组,以及/var/www:
/usr/sbin/groupadd www
/usr/sbin/useradd -g www www
mkdir -p /var/www
chown -R www:www /data0/htdocs/blog

8、创建php-fpm配置文件(php-fpm是为PHP打的一个FastCGI管理补丁,可以平滑变更php.ini配置而无需重启php-cgi):
在/usr/local/webserver/php/etc/目录中创建php-fpm.conf文件:
rm -f /usr/local/webserver/php/etc/php-fpm.conf
vi /usr/local/webserver/php/etc/php-fpm.conf

输入以下内容(如果您安装 Nginx + PHP 用于程序调试,请将以下的<value name="display_errors">0</value>改为<value name="display_errors">1</value>,
以便显示PHP错误信息,否则,Nginx 会报状态为500的空白错误页):

<?xml version="1.0" ?>
<configuration>

All relative paths in this config are relative to php's install prefix
<section name="global_options">
Pid file
<value name="pid_file">/usr/local/webserver/php/logs/php-fpm.pid</value>
Error log file
<value name="error_log">/usr/local/webserver/php/logs/php-fpm.log</value>
Log level
<value name="log_level">notice</value>
When this amount of php processes exited with SIGSEGV or SIGBUS ...
<value name="emergency_restart_threshold">10</value>
... in a less than this interval of time, a graceful restart will be initiated.
Useful to work around accidental curruptions in accelerator's shared memory.
<value name="emergency_restart_interval">1m</value>
Time limit on waiting child's reaction on signals from master
<value name="process_control_timeout">5s</value>
Set to 'no' to debug fpm
<value name="daemonize">yes</value>
</section>
<workers>
<section name="pool">
Name of pool. Used in logs and stats.
<value name="name">default</value>
Address to accept fastcgi requests on.
Valid syntax is 'ip.ad.re.ss:port' or just 'port' or '/path/to/unix/socket'
<value name="listen_address">127.0.0.1:9000</value>
<value name="listen_options">
Set listen(2) backlog
<value name="backlog">-1</value>
Set permissions for unix socket, if one used.
In Linux read/write permissions must be set in order to allow connections from web server.
Many BSD-derrived systems allow connections regardless of permissions.
<value name="owner"></value>
<value name="group"></value>
<value name="mode">0666</value>
</value>
Additional php.ini defines, specific to this pool of workers.
<value name="php_defines">
<value name="sendmail_path">/usr/sbin/sendmail -t -i</value>
<value name="display_errors">1</value>
</value>
Unix user of processes
<value name="user">www</value>
Unix group of processes
<value name="group">www</value>
Process manager settings
<value name="pm">
Sets style of controling worker process count.
Valid values are 'static' and 'apache-like'
<value name="style">static</value>
Sets the limit on the number of simultaneous requests that will be served.
Equivalent to Apache MaxClients directive.
Equivalent to PHP_FCGI_CHILDREN environment in original php.fcgi
Used with any pm_style.
<value name="max_children">128</value>
Settings group for 'apache-like' pm style
<value name="apache_like">
Sets the number of server processes created on startup.
Used only when 'apache-like' pm_style is selected
<value name="StartServers">20</value>
Sets the desired minimum number of idle server processes.
Used only when 'apache-like' pm_style is selected
<value name="MinSpareServers">5</value>
Sets the desired maximum number of idle server processes.
Used only when 'apache-like' pm_style is selected
<value name="MaxSpareServers">35</value>
</value>
</value>
The timeout (in seconds) for serving a single request after which the worker process will be terminated
Should be used when 'max_execution_time' ini option does not stop script execution for some reason
'0s' means 'off'
<value name="request_terminate_timeout">0s</value>
The timeout (in seconds) for serving of single request after which a php backtrace will be dumped to slow.log file
'0s' means 'off'
<value name="request_slowlog_timeout">0s</value>
The log file for slow requests
<value name="slowlog">logs/slow.log</value>
Set open file desc rlimit
<value name="rlimit_files">51200</value>
Set max core size rlimit
<value name="rlimit_core">0</value>
Chroot to this directory at the start, absolute path
<value name="chroot"></value>
Chdir to this directory at the start, absolute path
<value name="chdir"></value>
Redirect workers' stdout and stderr into main error log.
If not set, they will be redirected to /dev/null, according to FastCGI specs
<value name="catch_workers_output">yes</value>
How much requests each process should execute before respawn.
Useful to work around memory leaks in 3rd party libraries.
For endless request processing please specify 0
Equivalent to PHP_FCGI_MAX_REQUESTS
<value name="max_requests">500</value>
Comma separated list of ipv4 addresses of FastCGI clients that allowed to connect.
Equivalent to FCGI_WEB_SERVER_ADDRS environment in original php.fcgi (5.2.2+)
Makes sense only with AF_INET listening socket.
<value name="allowed_clients">127.0.0.1</value>
Pass environment variables like LD_LIBRARY_PATH
All $VARIABLEs are taken from current environment
<value name="environment">
<value name="HOSTNAME">$HOSTNAME</value>
<value name="PATH">/usr/local/bin:/usr/bin:/bin</value>
<value name="TMP">/tmp</value>
<value name="TMPDIR">/tmp</value>
<value name="TEMP">/tmp</value>
<value name="OSTYPE">$OSTYPE</value>
<value name="MACHTYPE">$MACHTYPE</value>
<value name="MALLOC_CHECK_">2</value>
</value>
</section>
</workers>
</configuration>
9、启动php-cgi进程,监听127.0.0.1的9000端口,进程数为200(如果服务器内存小于3GB,可以只开启64个进程),用户为www:
ulimit -SHn 51200
/usr/local/webserver/php/sbin/php-fpm start
注:/usr/local/webserver/php/sbin/php-fpm还有其他参数,包括:start|stop|quit|restart|reload|logrotate,
修改php.ini后不重启php-cgi,重新加载配置文件使用reload。

10、安装ZendOptimizer
wget http://downloads.zend.com/optimi ... glibc23-i386.tar.gz
tar xzf ZendOptimizer-3.3.3-linux-glibc23-i386.tar.gz
cd ZendOptimizer-3.3.3-linux-glibc23-i386
./install

Please specify the location for installing /usr/local/Zend
The following configuration changes have been made:                                              x
x                                                                                                  x
x - The php.ini file has been relocated from /usr/local/webserver/php/etc to /usr/local/Zend/etc   x
x                                                                                                  x
x - A symbolic link for the php.ini file has been created in /usr/local/webserver/php/etc.         x
x                                                                                                  x
x - The original php.ini was backed up to                                                          x
x  /usr/local/webserver/php/etc/php.ini-zend_optimizer.bak
ZendOptimize安装后,不用做任何就配置,只需重启php-fpm,就可以与eaccelerator很好地兼容
修改php.ini后
要执行此命令,使配置文件生效,不用重启Cherokee:
/usr/local/webserver/php/sbin/php-fpm restart
三、配置开机自动启动php-fpm
vi /etc/rc.local

在末尾增加以下内容:
ulimit -SHn 51200
/usr/local/webserver/php/sbin/php-fpm start

四、优化Linux内核参数
vi /etc/sysctl.conf

在末尾增加以下内容:
net.ipv4.tcp_fin_timeout = 30
net.ipv4.tcp_keepalive_time = 300
net.ipv4.tcp_syncookies = 1
net.ipv4.tcp_tw_reuse = 1
net.ipv4.tcp_tw_recycle = 1
net.ipv4.ip_local_port_range = 5000    65000

使配置立即生效:
/sbin/sysctl -p

五、安装Cherokee
cd /root/download
wget http://www.cherokee-project.com/ ... rokee-0.99.9.tar.gz

tar xzf cherokee-0.99.9.tar.gz
cd cherokee-0.99.9
./configure --localstatedir=/var --prefix=/usr  --sysconfdir=/etc --with-wwwroot=/var/www
make
make install

添加Cherokee启动脚本
因为Cherokee默认提供的安装脚本只适用于debian或ubuntu系统,所以需要手动写,从网上拷贝来一个,稍作修改
vi /etc/init.d/cherokee
#!/bin/bash

#
# chkconfig: 2345 55 25
# description: Cherokee http server
#

. /etc/rc.d/init.d/functions
RETVAL=0
prog="cherokee"
worker="$prog"
#base_dir="/usr/local/cherokee"
conf_file=/etc/cherokee/cherokee.conf
bin_file=/usr/sbin/${worker}
pid_file=/var/run/cherokee.pid.worker
start() {
echo -n $"Starting $prog: "
daemon $bin_file -C $conf_file -d && success || failure
RETVAL=$?
echo
[ $RETVAL = 0 ] && touch /var/lock/subsys/${prog}
return $RETVAL
}
stop() {
echo -n $"Stopping $prog: "
if [ -r "$pid_file" ]; then
if [ -n `cat $pid_file` ]; then
killproc $bin_file -TERM
else
failure $"Stopping $prog"
fi
else
failure $"Stopping $prog"
fi
RETVAL=$?
echo
[ $RETVAL = 0 ] && rm -rf /var/lock/subsys/${prog} ${pid_file}
}
restart() {
stop
sleep 1
start
}
reload() {
echo -n $"Reloading configuration of $prog: "
killproc $bin_file -HUP
RETVAL=$?
echo
}
logrotate() {
echo -n $"Rotating logs of $prog: "
killproc $bin_file -USR2
RETVAL=$?
echo
}
case "$1" in
start)
start
;;
stop)
stop
;;
restart)
restart
;;
reload)
reload
;;
logrotate)
logrotate
;;
status)
status $prog
RETVAL=$?
;;
*)
echo $"Usage: $0 {start|stop|restart|reload|status|logrotate}"
exit 1
;;
esac
exit $RETVAL
保存退出
chkconfig --add cherokee
chkconfig --level 235 cherokee on

开启Cherokee的Web管理界面
chkrokee-admin -b &
这里会提供用户名和一次性的密码

整合Cherokee和PHP
打开http://localhost:9090/
用开启chkrokee-admin时生成的admin和密码登录进去后
点击左侧导航栏的“Information Sources”,在右侧“Known sources”下面列出了目前已知的信息源,点击默认的“php”,进入php设置:

Type: “Local Interpreter”(就是本地解释器),一般用在fastcgi的可执行程序与cherokee运行在同一台服务器的情况。
“Remote Host”(就是远程主机),一般用在fastcgi的看执行程序与cherokee不在同一服务器的情况,或者为了保持cherokee和fastcgi进程更好的独立性。
Nick: 这个“信息源”的名称,具体就随意了^^
Connection: “信息源”提供的连接方式,可以设置为“IP地址:端口”的方式(比如:127.0.0.1:9000),也可以设置为Unix的socket(比如/tmp/php.sock)。
Interpreter: “信息源”的解释器,也就是fastcgi的可执行文件以及其运行参数。这里我们将原有值改为:/usr/local/webserver/php/bin/php-cgi -b 9000。
此处的9000为上文php-fpm中定义的9000端口。
Spawn timeout: 超时设置(单位:秒,默认是3秒),用于cherokee与fastcgi进程通信时的超时阀值,这里采用系统默认值,不用填写即可。

本例中设置为:
Type:Local Interpreter
Nick:PHP LOCAL
Connection:127.0.0.1:9000
Interpreter:/usr/local/webserver/php/bin/php-cgi -b 9000
其余均为默认值
左侧选择Hard restart,点击Save(此处只所以选择Hard restart,是因为只有这个才会使配置保存到/etc/cherokee/cherokee.conf,如果是Graceful restart,则只对本此运行有效)
点击左侧导航栏的"Status",点击右侧"Launch",这时才可以把Cherokee启动起来。

此时,Cherokee的运行用户和组都是root,这是非常不安全的,这里把它修改为用www用户和组运行
chown www.www /var/log/cherokee.access
chown www.www /var/log/cherokee.error

点击左侧导航栏的"General",点击“Server Permissions”,将User和Group更改为www,其余默认,左侧选择Hard restart,点击Save。
六、安装vsftpd
yum install vsftpd
vi /etc/vsftpd/vsftpd.conf
将相应内容修改为
#anonymous_enable=YES
xferlog_enable=YES
xferlog_file=/var/log/vsftpd.log
chroot_list_enable=YES
chroot_list_file=/etc/vsftpd/chroot_list
touch /etc/vsftpd/chroot_list
添加vsftpd自动启动
chkconfig --level 235 vsftpd on
启动vsftpd
service vsftpd start

七、新建站点流程
1、创建目录
mkdir /var/www/test.com

2、新建FTP用户
useradd -g www -d /var/www/test.com -s /sbin/nologin -M test

3、修改test用户名密码
passwd test

4、将用户锁定在主目录下(此例中为/var/www/test.com)
echo test >> /etc/vsftpd/chroot_list
或者
vi /etc/vsftpd/chroot_list
向里面添加test
用户名一行一个

5、更改目录属性
chown -R test.www /var/www/test.com

注意问题
修改cherokee运行用户后,记住要修改cherokee的属主属性,否则会报错


 楼主| 发表于 2010-3-15 06:26:18 | 显示全部楼层
http://www.cherokee-project.com/

cherokee-win32.zip (1.21 MB, 下载次数: 2)


cherokee-0.99.43.tar.gz (5.43 MB, 下载次数: 0)
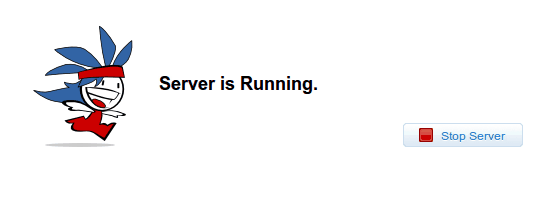
发表于 2010-3-15 19:00:54 | 显示全部楼层
UB下测试 第一印象 快
 楼主| 发表于 2010-3-17 09:11:05 | 显示全部楼层
尽早试一下WINDOWS下的。才是我们项目中需要的


CherokeeWIN32.rar (655.31 KB, 下载次数: 0)


Cherokee 号称是目前世界最快的 Web 服务器软件,在性能上,甚至比 Nginx 还略胜一筹。
Cherokee 的功能包括支持 FastCGI、SCGI、PHP、CGI、TLS 及 SSL 加密连接,虚拟主机,授权认证,实时编码,载入均衡,与 Apache 兼容的 log 文件等等。
Cherokee 内含一个名为 cherokee-admin 的工具,执行后,允许管理员直接通过浏览器进入http://localhost:9090/对其进行管理和配置。比如,开启或关闭服务器,进行一般选项的设定,配置虚拟服务器、信息源、图标、Mime 类型等项目。
您需要登录后才可以回帖 登录 | 注册

本版积分规则

小黑屋|手机版|Archiver|boway Inc. ( 冀ICP备10011147号 )

GMT+8, 2024-4-29 20:30 , Processed in 0.109096 second(s), 19 queries .

Powered by Discuz! X3.4

Copyright © 2001-2021, Tencent Cloud.

快速回复 返回顶部 返回列表